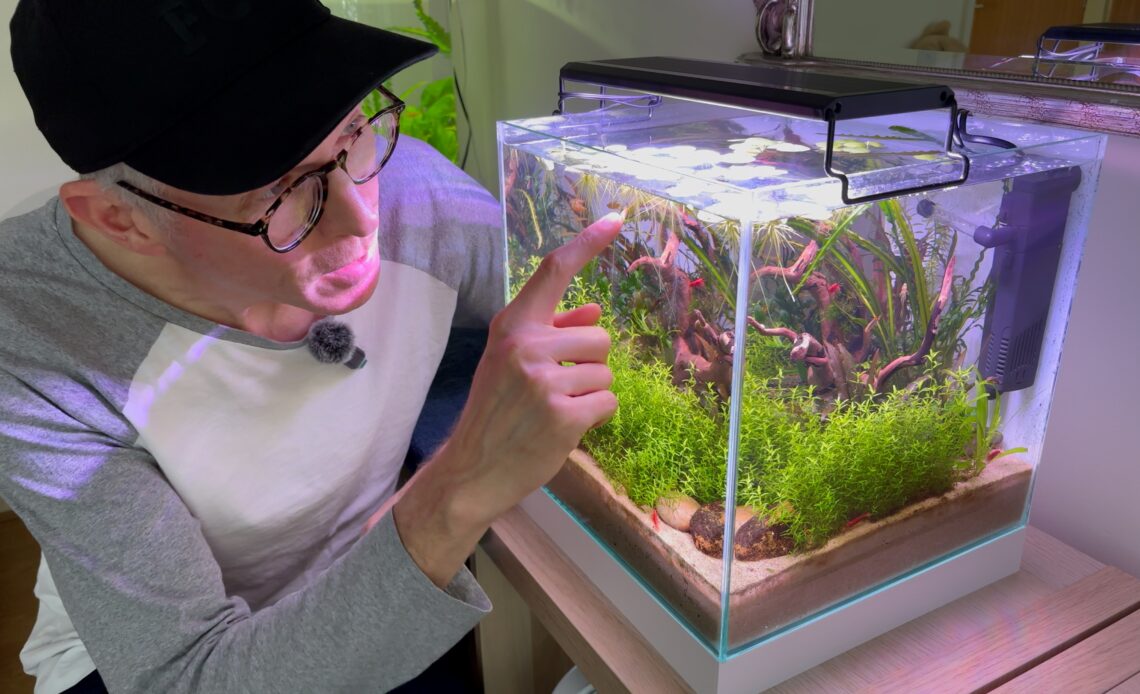
Welcome to Aquasplainer. I’m still finding my feet making videos about aquacaping, but I have posted several shorts featuring my latest project, this 22 L nano cube. Since posting them, I’ve had a few questions from viewers. So, I thought I’d put together something bigger that looks at all the steps involved from start to finish and also I hope to give you some of the thinking behind that, which might be informative, for example, if you’re starting a new tank and looking for ideas or if you’re looking for inspiration for your next aquacape. I’ve set it up into chapters so you can quickly jump to any aspect of this that interests you. Just check out the description.
The concept behind this aquascape
First of all, something about the concept or the thinking behind this tank. Initially, what I wanted to do was create a new home for my better fish, Biffy, who’s currently in a 35l biOrb tube. But after I started looking around for ideas and inspiration the direction changed a little bit and I decided I wanted to create a nano cube aquacape with nano fish, a nano cleanup crew, and also I wanted to try some new plants, experiment, discover new things along the way.
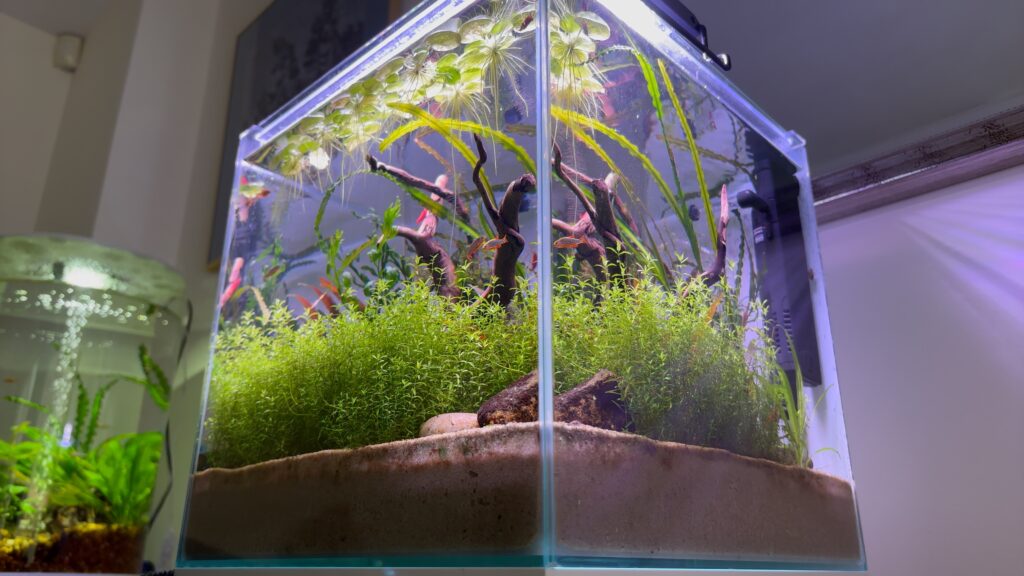
I didn’t want to do things I’d already tried before. I wanted to explore. One of the things I wanted to try out was the dirted tank approach, so that’s something you’ll find out about further down. At the same time, I wanted to keep everything practical and keep the costs down. There’s a cost of living crisis going on and spending lots of money on a new fish tank didn’t seem like the right thing to do. But most of all, I wanted to try new things and learn from the experience. The outcome is this beautiful nano cube. It’s a living, breathing ecosystem. It looks beautiful sitting here in my living room and I often refer to it as a ‘living light’. Biffy is staying put for now, but we’re going to build him a new home in our next project.
A nanocube tank
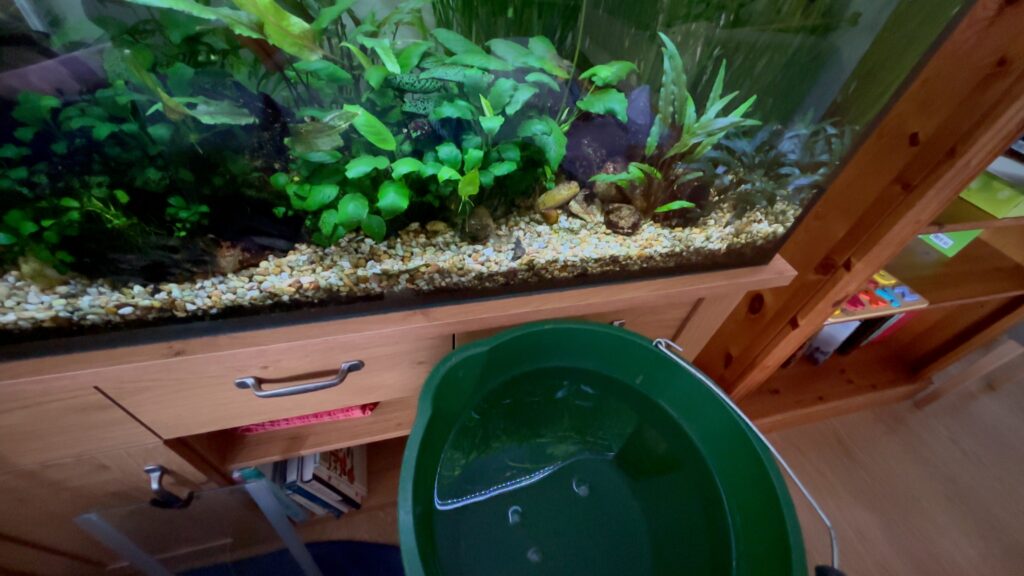
Let’s start in the most logical place with the glass. This is a tank that I actually had in the cupboard. I’ve owned it for a few years now. It’s a Ciano Nexus 25. Definitely a budget model. I think you can pick one up online for about £55 or £60. It measures 29 by 29 by 29cm and it holds about 22 litres. The glass is only 3 mm thick. And because it’s so thin, there’s very little refraction as the light passes through the glass. And that makes it very clear from that point of view.
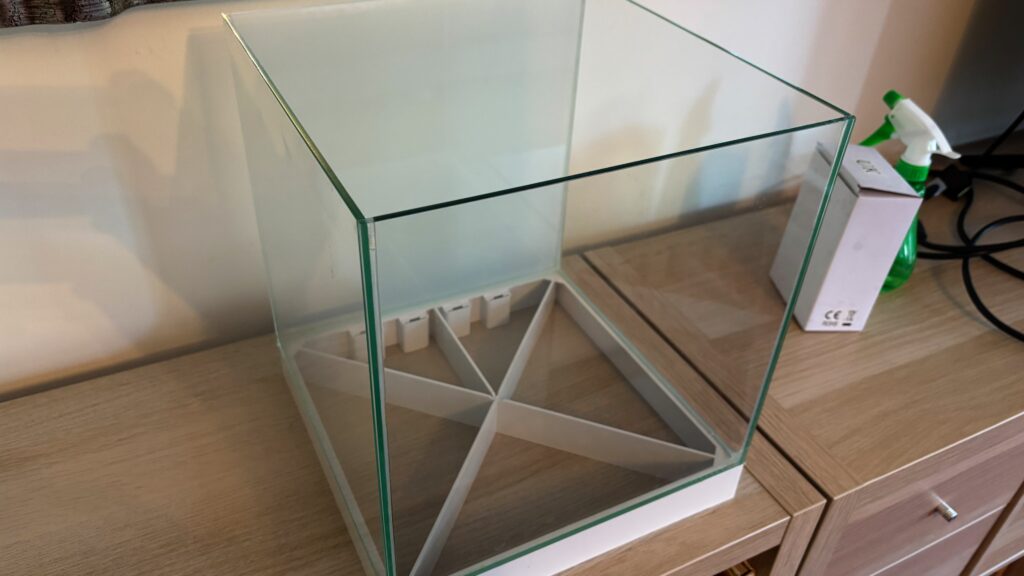
Of course, it being thin also makes it fairly fragile, so you have to be really careful if you’re putting heavy heavy rocks in there. It came with a plastic lid, which is useful because there’s a cat around. And it has a white plastic base which I think looks okay. It came with an LED light on a stalk that attaches to the base at the back but that light was nowhere near powerful enough for a for a planted aquarium. So, I’m using something else. It also came with a Ciano CF40 filter and we’ll have a look at that as well as the light a little bit further down the line.
Ciano Nexus 25 tank on Amazon
Dirted tank approach
With this aquascape, I wanted to try a dirted tank approach. So instead of just planting into into some gravel or buying a manufactured substrate or buying aqua soil to put underneath my substrate, I went out into the wild and I got some mud. The mud in this tank comes from a local canal. When they dredge the canal to make it deep enough for vessels to pass through, they often leave piles of mud on a bank. So, I just scooped it up and brought it home for use in this aquascape. I put a one-inch layer of mud at the bottom of the aquarium. The idea is that the mud comes from a living ecosystem in the canal, comes packed with organic matter and that basically turns into nutrients for the plant for the plants in a tank like this.
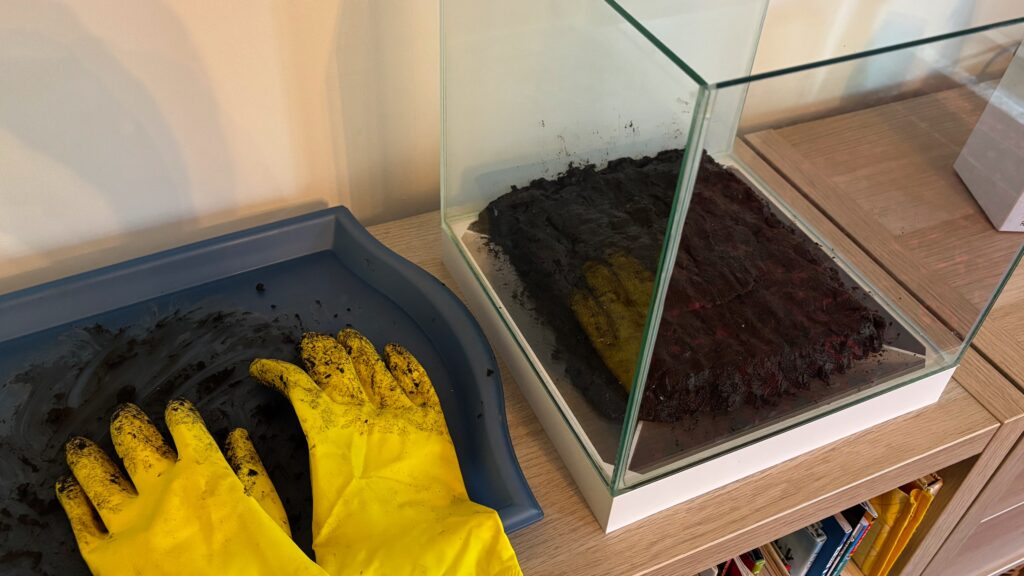
The biofilm that’s on the mud has spread onto all the surfaces in this aquarium which helps make it a healthy ecosystem. Mud also contains microorganisms including the kind of bacteria that you need to break down organic waste like fish poo for example. These bacteria turn ammonia into nitrites and then nitrites into nitrates. And having nitrates in your water is excellent if you want to grow healthy plants.
Sand substrate aquarium
Next, I’m going to talk about the sand at the bottom. I’ve never used sand as a substrate in an aquarium before so this was new to me – and all part of the experiment, I guess. The mud at the bottom is about an inch thick. And then there’s a further inch of sand capping it off. The sand that I’ve used in this tank is play sand. You can buy it at your local DIY store. It only costs about £5 to £10 for 10 kilos.
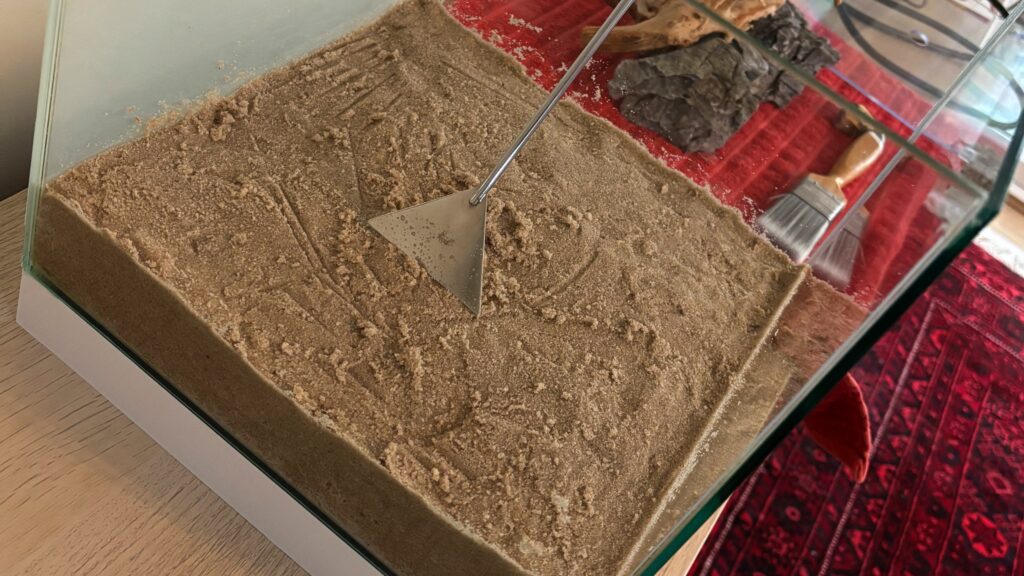
Play sand is non-toxic – it has to be if children are going to play in it – and that makes it safe for an aquarium. The layer of sand holds the mud down. And as the water filters down through the sand, it allows the nutrients in the mud to diffuse throughout the water column, which is basically all the water from sand all the way up to the top of the tank – gradually – which is important because you want the nutrients in the mud to last for a long time.
One of the things I discovered about sand is that it’s actually a lot easier to plant into sand than you might think. I always thought the sand would get washed around on the current, that it’s very light. Actually, it is pretty heavy and it sinks in around the roots when you plant something and quickly holds the plant in place. You can get white aquarium sand. It costs more, but I think the play sand that I’ve used here looks really natural.
Play sand on Amazon
Hardscape – rock and wood
My approach with the hardscape really was to keep it simple. Sometimes you look at an aquascape and all you see is wood and rock. I wanted people to see a whole ecosystem and I wanted my plants to come to the fore, so the hardscape here is for visual interest and for a little bit of structure. It’s also definitely a play thing for the shrimps, snails and fish to mess around with. I started off by buying three elephant skin rocks at the local aquatics centre and a very interesting complex piece of azalea root.
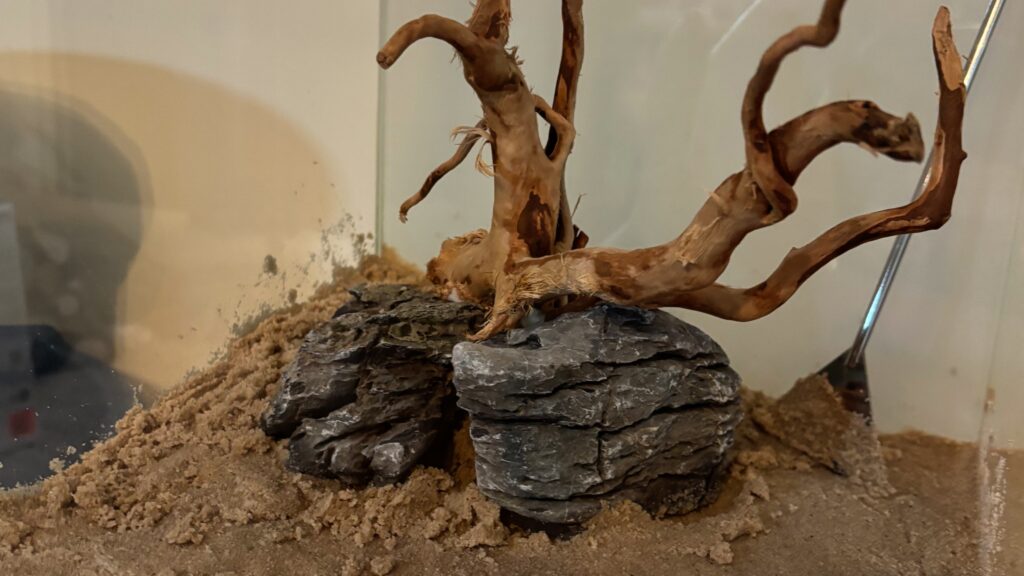
With the dimensions of my tank in mind, I started to experiment with different configurations using the rocks and the wood. I was thinking of a composition coming out of the back left of the tank and across to the front right. I tried different ways of connecting them and I found I didn’t really need three pieces of rock, just two. Everything clicked together when I kind of made a sort of V-shaped configuration with the two rocks and then was able to balance the wood sort of in the gap that’s created towards the back between them. This was like quite a natural setup because the wood literally balanced on the rock.
However, I did fix everything together using tiny little swabs of cotton wool pressed into the spots where the wood touches the rock or where the rock where the rocks come together and soaking that cotton wool with superglue. It’s held fast, solid, and I do think the structure is a perfect platform for the plants but also a great playground for the fish and invertebrates in the tank.
Elephant rock on Amazon
Azalea root on Amazon
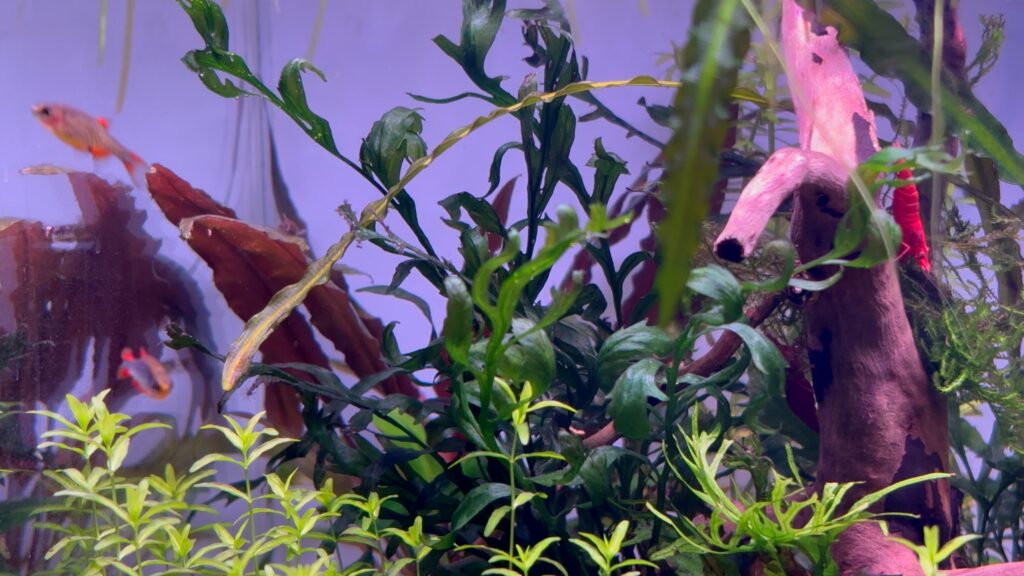
Planted nano aquarium
I did put a lot into planting this nano cube. Four of the main plants in this tank were new to me – bolbitis, pearlweed, there’s a crinum bulb at the back and the frogbit that you can see floating at the top.
Bolbitis heudelotii
Let’s let’s start with the bolbitis heudelotii. This I’ve attached to the wood in the hardscape in two places towards the back of the aquarium. This is a rhizome plant so you don’t plant it in the substrate. You need to attach it to wood or rock. And I’ve done this using cotton thread – just just a sort of beige coloured cotton thread wrapped around the rhizome which is like the the stem at the bottom which the leaves grow out of. I’ve done it carefully so that the thread goes in between each each leaf stem basically. I haven’t tied it but you can do it nice and subtly with the plant secured to the wood.
It’s got these lovely dark green leaves that spread upwards. They’re of an unusual shape and I really think it is a lovely alternative to say for example, Java fern. I guess if there’s a drawback when it comes to bolbitis, it’s that it grows quite slowly and I think that’s because it absorbs its nutrients from the water rather than from its roots. As it’s attached to the wood the roots don’t go into the soil and gain nutrients that way.
Bolbitis heudelotii on Amazon
Hemianthus micranthemoides – Pearlweed
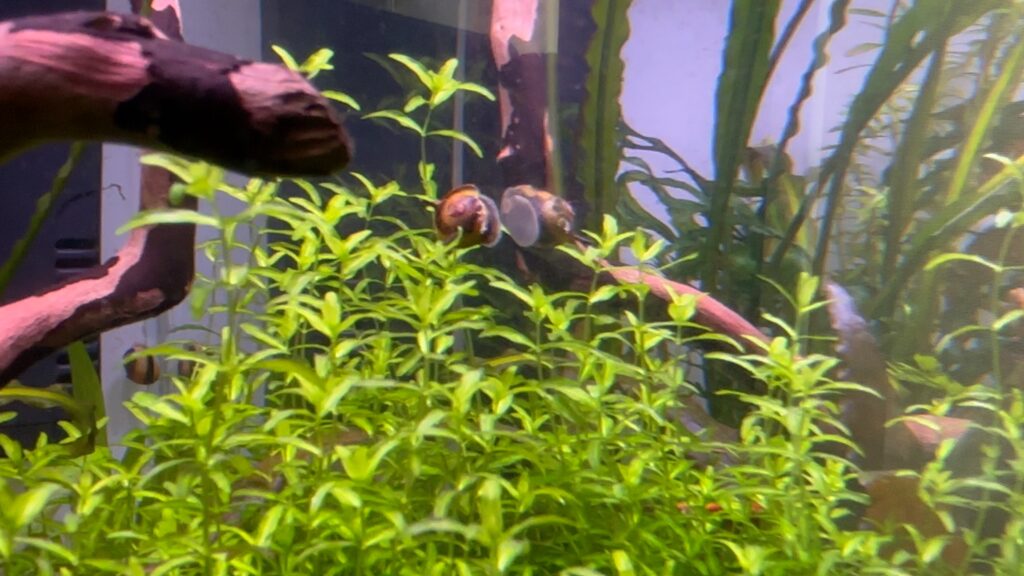
The second key species that I’m growing is pearlweed. Now, I’ve never had much success with carpet plants in the past. This is a low tech setup, which means there’s no CO2 being injected into the water and it’s hard to find a hardy carpet plant that can survive without CO2 injection. The solution, I think, is pearlweed. it’s what they call a bulletproof plant and now it is more or less growing out of control.
Alongside the bolbitis, I bought one pack of pearlweed from Pro Shrimp, and I split it into 10 little clumps which I planted in the sand to try and create a little bit of a foreground in this tank. At first, there was some melt and a little bit of fragmentation amongst those 10 segments, but whenever a a stem would come loose, I would plant it in the gaps in between to propagate and eventually thicken this kind of pearlweed colony here. Slowly but surely, it has taken over the tank… This tank has only been set up for about 3 months and the plant has really established itself.

It provides three things. When we’re talking about this ecosystem, first of all, it’s a great filter for waste that might be in the water – fish waste and waste from the shrimps, as well as bits of organic material from other plants that sink to the bottom. It provides an excellent home for the shrimp. They’re constantly in there feeding on the biofilm on its leaves, feeding on any of the waste that’s trapped in there. Potentially, they can breed in the safety of the pearlweed. And thirdly, it consumes CO2 that’s produced by the fish and shrimps in the water. When it photosynthesises, it it turns that CO2 into oxygen. Now and again you can see little bubbles coming up from the pearlweed into the water.
Pearl weed on Amazon
Crinum calamistratum
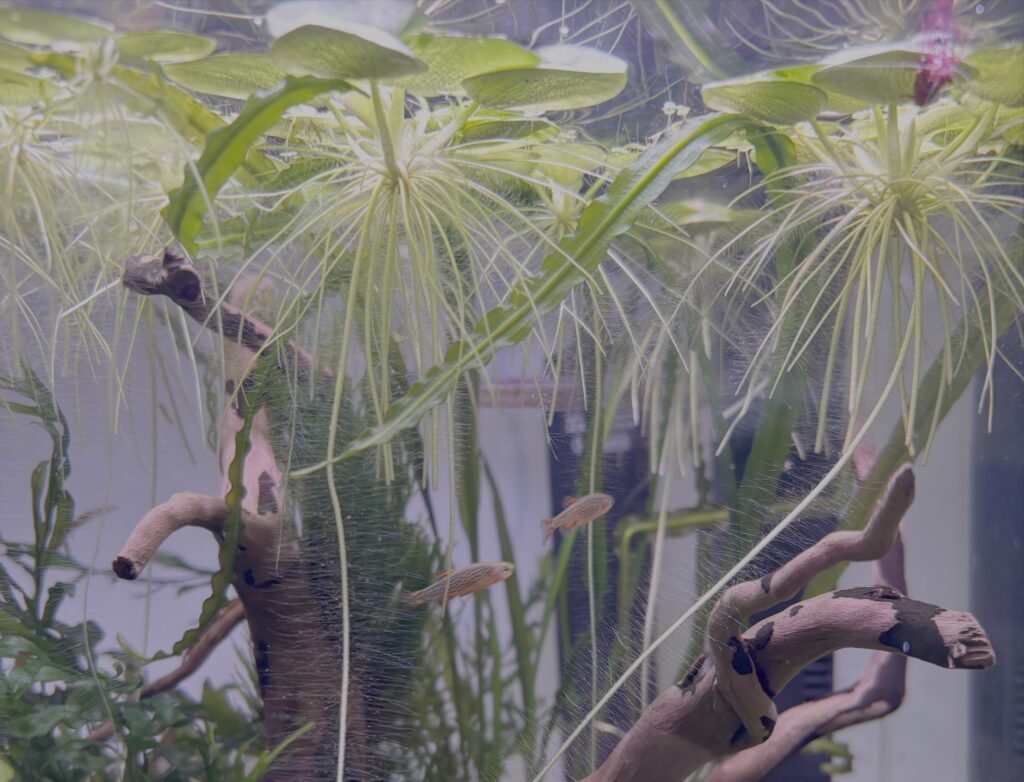
The third plant that I wanted to talk to you about is a crinum bulb called crinum calamistratum. You might be able to see its long crinkly fronds. I planted the bulb towards the back of the aquarium in between the two rocks which form the main part of the hardscape and it seems to be growing quite well. The fronds grow up towards the surface then kind of project themselves forward to towards the front of the tank. It looks okay. I like the way they entangle themselves with the wooden parts the of of the hardscape, they kind of bring some visual interest. Certainly the shrimp and the otocinclus in the tank love to scurry up and down the crinum fronds, cleaning them and stuff. But they do look a little bit thin and maybe a little bit chaotic. Every few weeks or so I remove the the longest crinum fronds. It helps keep the tank looking a little tidier.
Crinum calamistratum on Amazon
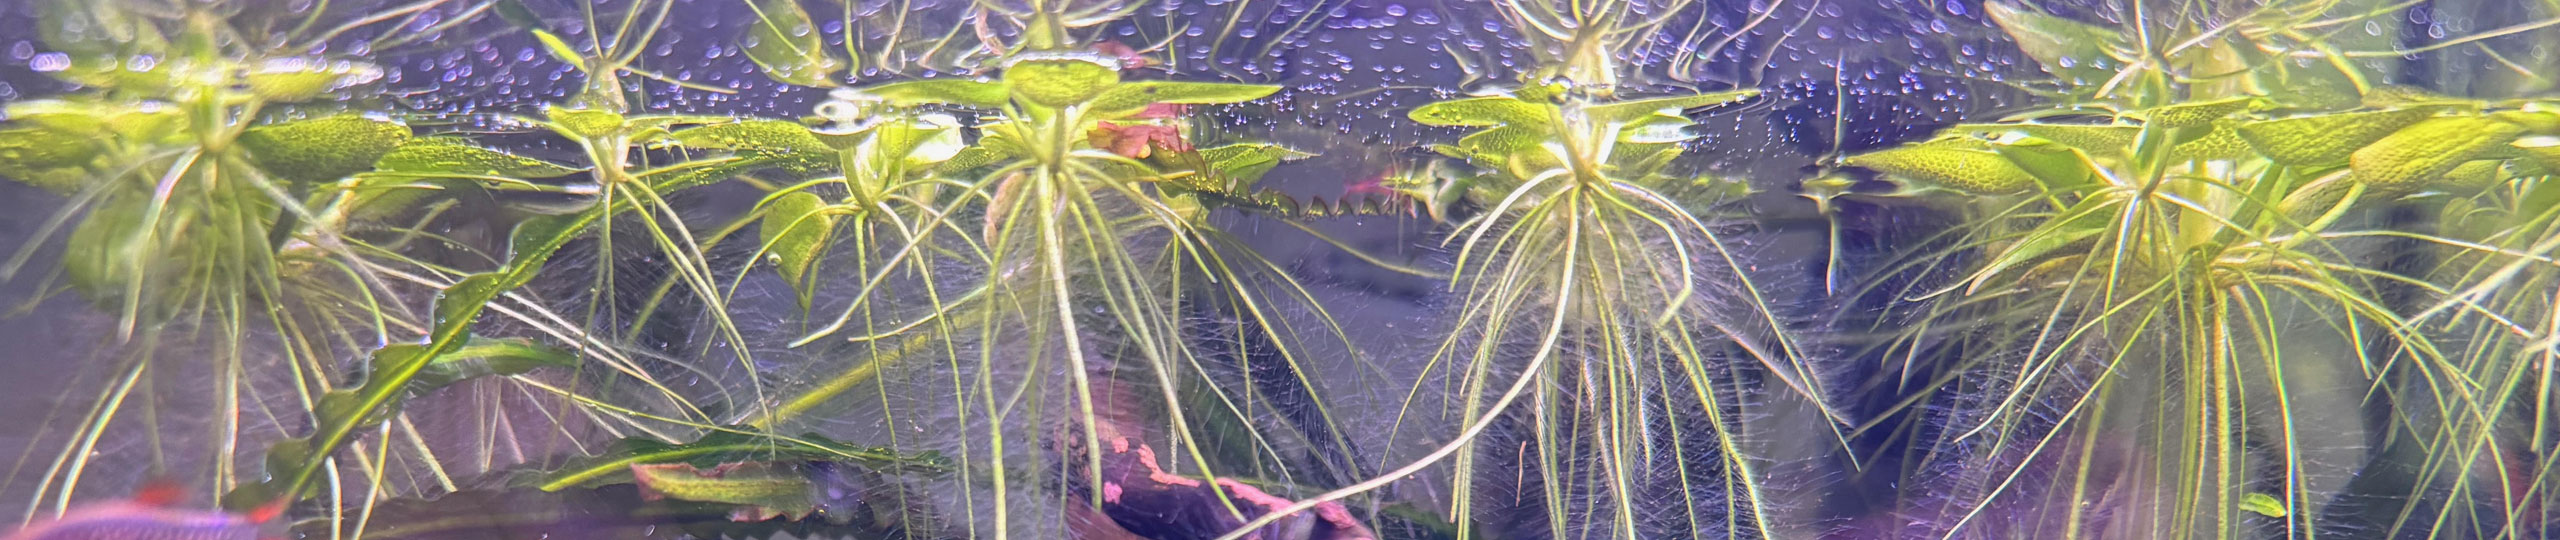
Limnobium laevigatum – Frogbit
The final key plant in my cube aquacape is frogbit or limnobium laevigatum. This is the floating plant that you can see across the top at the surface of the water. I added this plant in about a month after starting the aquascape just to bring a bit more variety to the habitat. Like the pearlweed, it’s grown very quickly and I think this could be down to the quality of the water. I think it shows that nutrients from the mud are rising up through the sand and into the water column, enabling some of the plants – to grow very quickly, particularly the frogbit and the pearlweed.
Its roots reach down into the water. Each main root has thousands of tiny little filaments on it, and these tend to capture bits of waste that are floating around in the water and then either the plant consumes that waste itself or the shrimps latch on to it and kind of harvest little morsels from the frogbit roots.
In that way the frogbit forms part of the tank’s natural filtration system. It breaks up the light a little bit. It also it also makes a wonderful playground for the shrimp that as well as climbing up and down the roots, they love to hang upside down feeding off the bottom of the or or the underside of the kind of like lily pad leaves that sit at the surface.
Something else that’s interesting about frogbit is that it takes carbon dioxide from the atmosphere rather than from the water. So that leaves carbon dioxide in the water for the other plants to use when they photosynthesise. As for any oxygen it creates, I’m not sure whether that’s expelled into the atmosphere or into the water.
I have to remove some frog bit from this tank every week, otherwise it takes up the entire surface of the water. But the main thing with the frogbit is that it makes the tank look like a tiny little jungle and that’s what I love about it.
Frogbit floating plant on Amazon
Taxiphyllum barbieri – Java moss
There are a couple of other plant species that I purchased to put into this aquarium but they’re more secondary. First of all, I got some Java moss which I pushed into some of the little nooks and crannies and in between the branches on the rock and on the wood. It grew really quickly at first. Again, I think the nutrients in the water have helped it.
The Java moss started to die away a little bit so I took it all out, trimmed away the dead bits and I’ve put it back in. I think it’s only just reestablishing itself.
Rotala rotundifolia
The other secondary plant that I brought in is a rotala rotundifolia. I did this because I had been hoping that the bolbitis would fill in quite well as a background plant but it’s grown quite slowly. Instead of waiting, I bought some rotala. I planted it near the back just to the left of the heater and it grew fairly quickly up to the surface. I cut the stems back again and replanted the cuttings into the sand and so hopefully the rotala will help me fill the space in the background and I won’t have to worry so much about the bolbitis growing so slowly.
Rotala rotundifolia on Amazon
Anubias nana
In total I only purchased six plants to put into this nano cube. However, to get things going at the beginning, I did use a few cuttings from my other tanks… I got two pieces of anubias and I attached them to pebbles using cotton thread and placed these near the back on either side of the hardscape. Basically, I did this not so much to have more plants in the tank, but what I wanted to do was introduce some biofilm and some algae, which is sort of growing a little bit on the anubias, which would accelerate my ability to bring in some snails and some shrimps.
Cryptocoryne
Another plant that I added from my existing tanks is uh cryptocoryne. I planted some next to the rocks in the middle, but that has kind of been swamped by the pearlweed. It’s growing healthily, but you can’t see it all that well. So perhaps there’s not much point. But another one I planted back in the back in the back left corner where the sand is the deepest.

I didn’t really think of it as one that would become kind of like a background plant. I just popped it in there at the back corner as a bit of an experiment. It wasn’t thriving in the tank it was in. It was just doing okay. But now it’s really, really turned it around and I would say it is thriving definitely here. The leaves are turning a rusty red colour. I think it’s benefiting from all the nutrients coming up from the dirt, from the mud underneath the sand. I’ve got to be honest, I don’t think I’ve ever seen a crypt look so healthy.
Affordable LED aquarium light
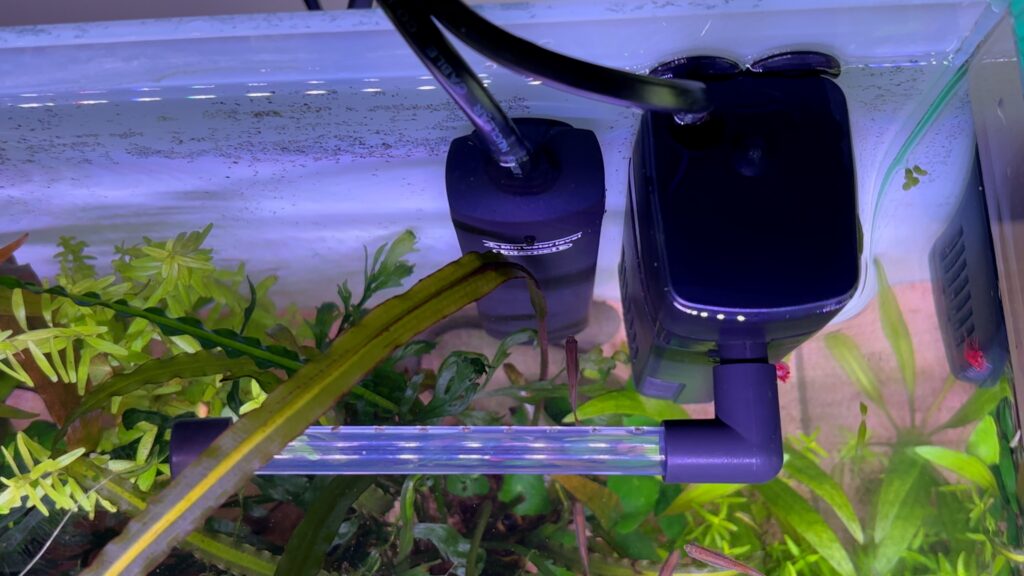
If you want to set up a planted tank, then a good light can be a game changer. When I first set this one up, I had a 7 watt clamp-on LED light, which was okay, but I thought the plants were growing a little too slowly. So I did a bit of research and I found a 14 watt LED aquarium light on eBay. It cost £30. It’s made in China and it’s unbranded. It’s the perfect size, made for a 30 cm tank. The little feet sit on the edges of the glass there. You can move it back to focus on the plants at the back of the tank or move it forward to illuminate the front. Wherever your light hungriest plants are, you can try and situate the light closer to them. I think it’s similar or perhaps exactly the same as the Hygger or the Nicrew models that you might see on Amazon or eBay.

It’s got some really great features. There are four LED colours – white, red, green and blue – and you can control the intensity of each of those areas of the spectrum separately. You can also set a timer and it has a sunrise and sunset setting. So when the light comes on, it comes on gradually in the morning. And when it turns off, it does so gradually at night going down in intensity by a few percent every minute or two.
A lot of the advice out there suggests that you limit your lighting on a fish tank to eight hours a day. Now, there’s a good reason for that. It’s because a lot of people have real problems with algae, which thrives when you leave the light on too much. I’ve actually gone a different route. I’ve set mine to illuminate for about 10 hours a day, but at a lower intensity. So, the white and the green LEDs, I’ve set them to shine at a maximum of about 50%. And the red and the blue ones, I’ve set them to illuminate at 65%. The reason I put the red and blue at a higher percentage is because when they photosynthesise most plants respond best to the red and the blue parts of the spectrum. Some people say that it gives this tank a slight purplish look. Personally, I think it looks fine.
Hygger 14W LED light on Amazon
Healthy aquarium water
Another essential element in an aquacape is the actual aqua – the water. Because I have several established tanks already, I had a head start. Half the water that I put in when I started this tank came from one of my other healthy fish tanks and the other half is tap water. The tap water I put through a Brita filter. And then I added API Stress Coat to dechlorinate it. And I also use Seachem Neutral Regulator to make sure it’s not acidic or base. Some people say that using a Brita filter makes no difference. I actually think it does help – it reduces the amount of heavy metals and other contaminants in the water and in my opinion it softens the water. Since I’ve been using it, I’ve had far less limescale buildup at the water line or around the filter area. I don’t only do that with this tank. I do it with all my other tanks. All my tanks do have very clear water in them. So, it seems to be working for me.
If you’re starting a tank from scratch and you don’t have access to already cycled fish tank water, you’ll need to use a product like Seachem Stability, which will introduce bacteria into the water. It will take a few weeks for the bacteria to establish itself in the water and on the surfaces in the tank as well as in the filter.
API Stress Coat on Amazon
Seachem Neutral Regulator on Amazon
Seachem Stability on Amazon
Brita filter on Amazon
The filter and heater
The heater is an Interpret fixed temperature model. It’s inexpensive and uncomplicated. You simply immerse it in the water, attach it to the glass with the suction cups, plug it in, and it heats the water to 25° C. Actually, I’ve put a thermometer in here and it’s usually read 26°, but give or take.
The filter is a Ciano CF40. It came with the tank as part of the package. It’s an internal filter submerged in the water. It has a jet tube nozzle to disperse the water as it pumps. It came with a charcoal pod in the column. I took this out because charcoal can kind of reduce the amount of nutrients in the water and I wanted my plants to really benefit from all the nutrients that I put in through the mud that’s underneath the substrate.
It came with a coarse sponge, so the water passes through the sponge, and then up through the impeller. I also added in a fine sponge so that you have a coarse sponge, a fine sponge, then it goes through the impeller and out through the jet nozzle into the tank. That way I kind of I can kind of reduce the amount of waste floating around in the tank. It helps keep the water clearer, but most importantly, the fine sponge helps slow how quickly the filter pumps the water.
The problem with the Ciano CF40 is that it’s not adjustable. It pumps the water really quickly. I didn’t want the filter blasting the sand everywhere when I first set up the tank so I had to play around with the jet tube quite a bit. I had it shooting water into the this side of the glass. I had it shooting the water forwards to the front of the tank. It was blowing the sand around at the front before all the plants grew in.
Having said that it is good to have some sort of current going through your tank. It keeps the plants healthy. It moves things around. It ensures that materials get back to the filter and are taken out. And some of the plants like the bolbitis do like to have a bit of current. In their in their wild habitat in Africa, that’s what they have. It helps them take nutrients from the water to have a current flowing across them.
Ciano CF40 filter on Amazon
Interpret 25W heater on Amazon
Cleanup crew
I wanted this nanocape to become a functioning ecosystem as quickly as possible so I needed something to deal with the organic waste that’s naturally produced by the plants as they grow. What I’ve done is I’ve assembled a natural cleanup crew. After the first week, I put in some bumblebee horn snails.
Bumblebee horn snails
These are basically a tiny version of the nerite snail. They’re distinctive because they have a black and honey coloured stripe pattern on their shells and little horns or spikes sticking up out of their backs. They look great. The only thing is if you handle them, you’ve got to be careful not to break those spikes. They’re definitely nano. Tiny little things. And they eat algae. They eat biofilm and they eat dead plant matter that falls to the bottom of the tank.
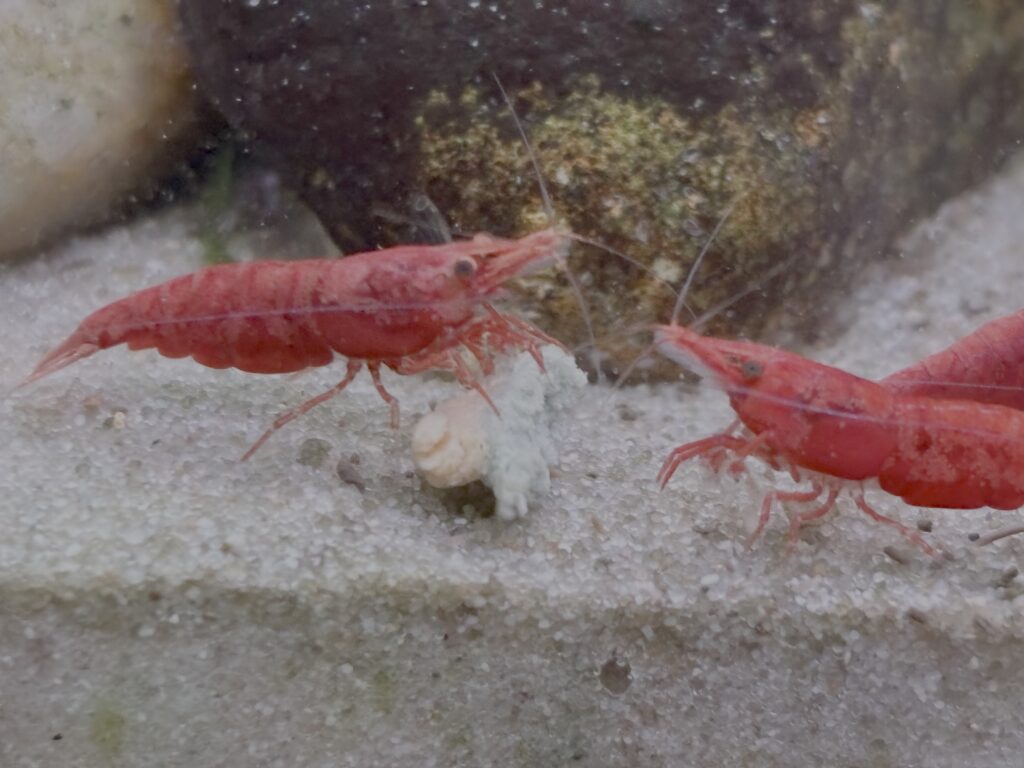
Neocaridina shrimp
After two weeks, I added some crustaceans, a couple of Sunkist orange shrimp. These are from the neocaridina species. Like like the snails, they eat algae and biofilm. They also eat mould. So early on there was a little bit of mould growing on the wood, which is really common when you start an aquascape and the shrimps… the shrimps kind of gobbled it up. Later, I added 13 cherry red neocaridina shrimp, so there’s a huge shrimp posse.
The other thing they eat is poop. So, there’s a system for dealing with sewage.
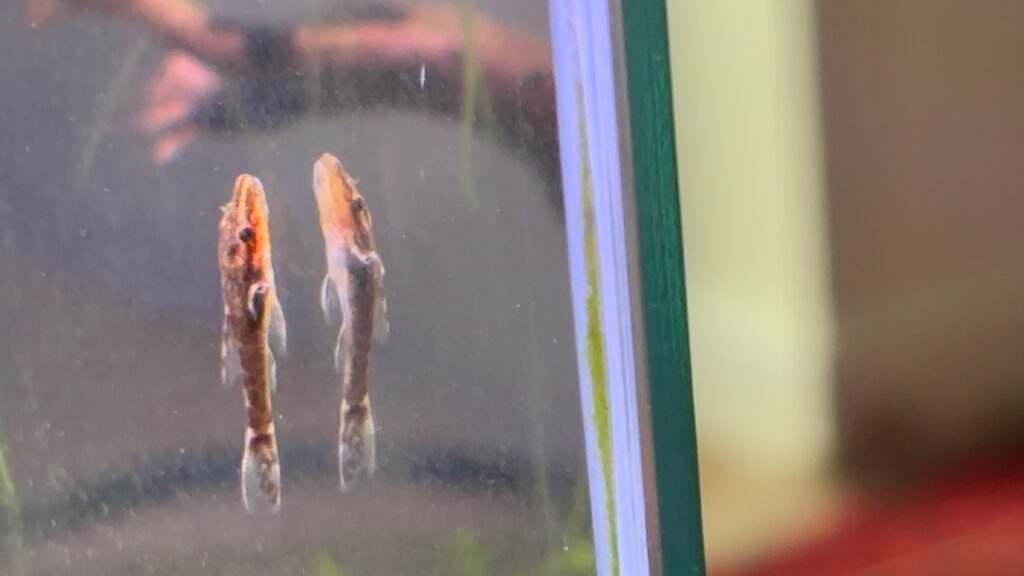
Otocinclus negro
The final part of my cleanup crew is a pair of otocinclus negro. They’re smaller than regular otos and they don’t have a black stripe down their sides. Their name suggests that they might be black in colouration, but they’re actually a dark mottled brown colour. They’re very nano. They’re very different, which I really like – tiny sucker mouth fish that clean the glass. They love going on the wood surfaces, some of the plant surfaces they really like as well, removing algae and biofilm and such.
All the members of my cleanup cleanup crew are tiny little things. I wanted this to be all nano. That’s why the betta fish was never introduced into this tank. All these little guys are doing a great job. There’s no algae problem in this setup.
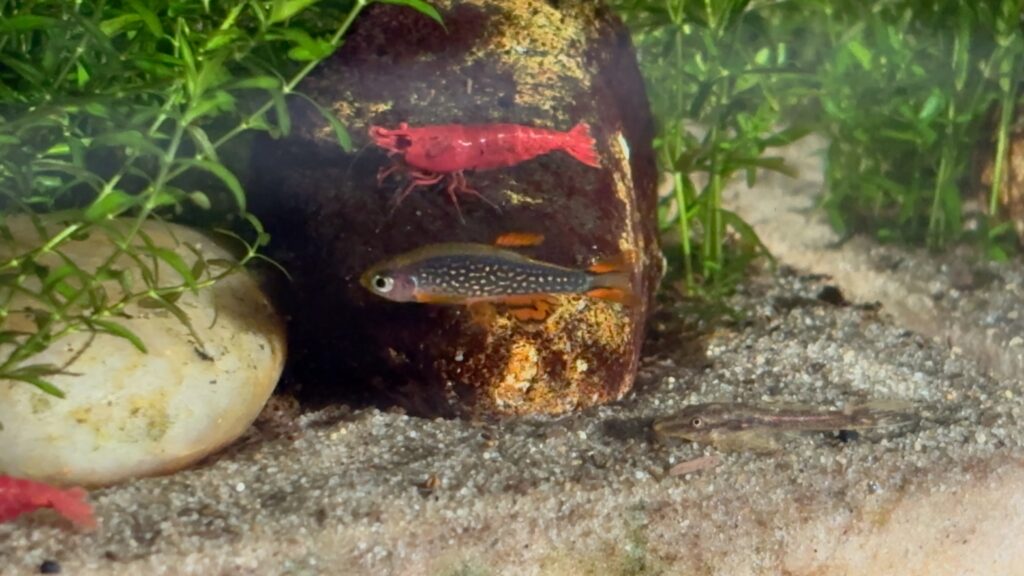
Feature fish – Celestial pearl danios
My feature fish is the celestial pearl danio. There are only six of them but they’re very spritely little things. They’re not as shy as I expected. They certainly don’t hide around at the back. You can see them venturing to the front all the time here while I’m talking. They’re playful. You’ll even see them carrying out mating behaviour and laying eggs in the pearlweed. Unfortunately, the shrimp eat the eggs almost as soon as they’re laid.
When you get in close, you can see a speckled pattern on the sides of the celestial pearl danios, like a star map. So, that’s where they get their name. They’re also called galaxy rasboras in some fish shops. Their fins are a glowing orangey kind of crimson colour. Very beautiful and very fast moving.
Something I was told about these fish when I was researching them was that they like to feed in the middle of the tank. I found that’s not the case. They’ll eat food that’s floating on the surface. They’ll eat food that’s down at the bottom. I give the fish and shrimps in this tank a varied diet that includes algae wafers, spirulina, insect pellets and flaked food. The celestial pearl danios eat all of those things
So far I’ve had no fish casualties. I think a couple of the shrimp might have died, but it’s quite hard to do a survey with the plants doing so well and there being so many places to hide.
Nanocube maintenance
Maintenance is light as this is such a small fish tank. The pearlweed and the frogbit need to be trimmed back about once every two weeks and I usually do a partial water change of five or six litres at the same time.
The filter gets cleaned out about once a month. It doesn’t get dirty really quickly but it does collect some of the plant cuttings.
This tank isn’t zero maintenance, but it is very easy to look after. There’s no complex CO2 system to mess around with. It’s a small tank so no task looks too daunting at any time and the water chemistry is very stable. Mostly it keeps itself pretty clean.
Conclusion
We’ve covered a lot of ground, but I hope that you’ve found the information useful and have found some inspiration and ideas and knowhow for your own setups.
I think in terms of what I set out to discover, the dirted tank method has really worked out, this is a healthy nano cube that generally looks after itself. The fish and plants all they all appear to be doing well. I haven’t spent loads of money setting it up and yet I think it looks pretty good. I just want the background plants to fill in a bit more and to get a bit taller and then I think I’ll be completely satisfied.
I really hope you’ve enjoyed this article or video. Thank you very much for visiting aquaSplainer. If you like what you’ve seen, please hit the Subscribe button on our YouTube page and hopefully we’ll see you again soon.
If you have any questions about the project, the process or the decision making, drop a comment below and I’ll do my best to respond. Thank you.
4 Comments